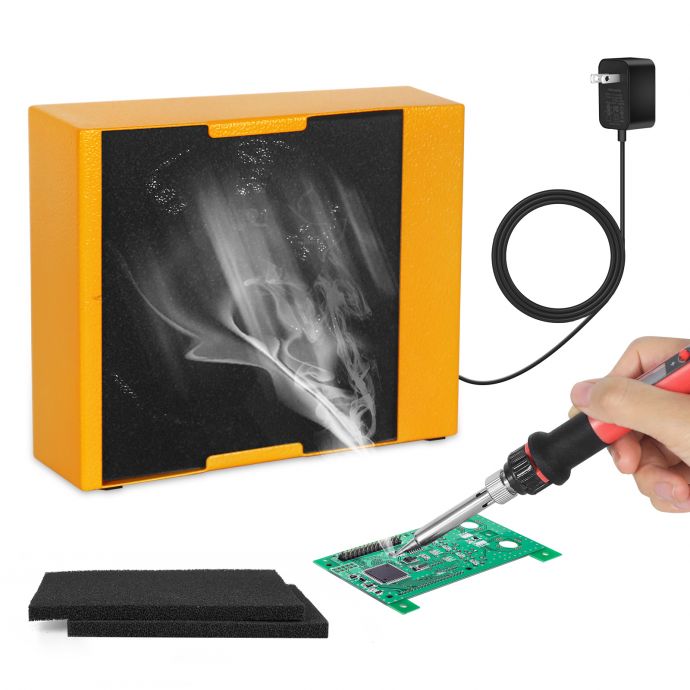
When you’re soldering electronics projects, the little details matter—but so does your health. Soldering produces fumes containing rosin and other chemicals that can be hazardous if inhaled over time. If you’re a hobbyist, maker, or even an electronics professional working from home, you might assume that occasional exposure is negligible. But repetitive exposure can lead to coughing, headaches, or even long-term respiratory problems. Protecting your lungs should be as important as perfecting that circuit.
Fortunately, you don’t need to spend a fortune or sacrifice portability to keep your worksurface clear of smoke. Building a compact, portable 12V solder fume extractor—affectionately nicknamed the “Smoke Slayer”—is a straightforward DIY project. You’ll gain peace of mind, cleaner air, and a new tool in your workshop arsenal, all powered by any standard 12V supply.

Let’s walk through the why, the how, and the step-by-step build for your own Smoke Slayer. This guide includes practical tips, parts recommendations, circuit basics, construction steps, and best practices for long-term reliability.
---
## Why Build a Solder Fume Extractor?
Soldering generates fumes from flux and solder wire. Even lead-free solder contains substances that, when heated, release particulates and volatile organic compounds (VOCs). Rosin-based flux is particularly problematic—its fumes can cause allergic reactions and respiratory issues over time.
Commercial fume extractors work well, but they’re often expensive and bulky. If you’re working in a small space or want to avoid the noise and clutter of commercial units, a DIY extractor is ideal:
- **Health Protection:** Filters out particulates and VOCs before they reach your lungs.
- **DIY-Friendly:** You can build a unit sized for your workspace and budget.
- **Cost Savings:** Off-the-shelf extractors often cost $50–$200, but you can build one for $20–$40.
- **Portability:** Use any 12V DC power source (wall adapter, battery, bench supply).
---

## How Does a DIY Smoke Slayer Work?
At its core, a fume extractor is a fan that draws solder smoke through a filter. The filter traps harmful particles, letting clean air return to the room. The essential components are:
1. **Fan:** Moves the air and solder smoke toward the filter.
2. **Filter:** Traps particulates and VOCs (usually activated carbon and mechanical filter foam).

3. **Shroud/Housing:** Holds together the fan and filter, directs airflow to maximize efficiency.
4. **Power Supply:** Provides steady 12V DC power.
A properly designed unit should:
- Pull smoke away from your workspace (ideally 100–150 CFM airflow).
- Use an effective filter (activated carbon and/or HEPA foam).
- Be positioned close to the soldering point (4–15 cm is ideal).
- Run quietly and efficiently from your 12V supply.
---
## Choosing Your Parts
### 1. **Fan Selection**
The fan is the heart of your extractor. You want enough airflow to clear smoke but not so much noise that it’s disruptive. Most makers use 120mm or 140mm DC brushless computer fans, which run on 12V.
- **Recommended specs:** 120mm size, 12V DC, 0.2–0.6A, 120–150 CFM.
- **Brands:** Arctic, Noctua, Cooler Master, or any generic brushless fan.
If your workspace is small, a 92mm fan can suffice. Larger fans move more air but require a bigger housing.
### 2. **Filter Media**
Effective filtration uses two layers:
- **Mechanical filter foam:** Catches larger particles.
- **Activated carbon sheet:** Absorbs VOCs and odors.
Activated carbon pads are widely available online and are often sold for kitchen range hoods or as aquarium filters. You can stack multiple layers for better filtration.
### 3. **Housing/Shroud**
You have several options:
- **Laser-cut acrylic or plywood.**
- **3D printed plastic.**
- **Upcycled plastic containers or fan guards.**
The housing should keep the filter tight against the fan and direct air forward. For simplicity, you can use a shallow box (gift box, electronics project enclosure) with a cutout for air intake, slot for filter layers, and mounting holes for the fan.
### 4. **Power Supply**
A standard 12V DC wall adapter is the easiest option. Many makers prefer barrel jack connectors or USB-C adapters with appropriate voltage. For portability, you can use a 12V battery pack, but bear in mind runtime will be limited.
### 5. **Switch/Control**
For basic wiring, an inline rocker switch or toggle switch makes operation simple. If you want adjustable speed, add a PWM fan controller.
---
## Tools & Materials List
Here’s a basic list for a hassle-free build:
- 1x 120mm 12V PC brushless fan (120–150 CFM)
- 1x 12V DC wall adapter (minimum 1A output)
- 2–3x activated carbon filter sheets (cut to size)
- 2x filter foam sheets (cut to size)
- 1x project box or fan guard housing (plastic, wood, or 3D printed)
- 1x toggle or rocker switch
- 1x barrel jack or terminal block (for power connection)
- Screwdriver, hot glue, zip ties, soldering iron (for connections)
- Wire, heat shrink tubing
Optional:
- 12V fan controller or potentiometer
- LED indicator
- Extra fan guard for protection
---
## Step-by-Step Assembly Guide
### Step 1: Prepare the Housing
- **Select your housing.** For a quick build, choose a shallow box that fits your fan. Cut a circular hole slightly smaller than the fan diameter for airflow.
- **Drill mounting holes.** Mark and drill holes for fan screws so the fan mounts flush inside or outside the housing.
### Step 2: Prepare the Filter Layer
- **Cut foam and carbon sheets.** Trim filter foam and activated carbon sheets to match the shape and size of your housing or fan guard.
- **Stack layers.** Place filter foam closest to the soldering intake, followed by the carbon sheet. You can sandwich them using wire mesh or fan guards for support.
### Step 3: Mount the Fan
- **Attach the fan.** Secure the fan to the housing with screws, zip ties, or hot glue. Ensure it blows outward (fumes drawn into the filter, clean air out the back).
- **Seal gaps.** Use foam tape or hot glue to seal any gaps between the fan edge and housing to maximize suction.
### Step 4: Wire Power and Switch
- **Wire the fan.** Connect the fan’s positive and negative terminals to your switch and barrel jack. For safety, add heat shrink tubing to all joints.
- **Mount switch.** Install the toggle switch on the housing, or use an inline switch in your power wire.
- **Check polarity.** Confirm the fan spins in the correct direction (blowing outward).
### Step 5: Test and Fine-Tune
- **Power up.** Plug in the 12V adapter and test the extractor. Hold a solder stick near the intake, activate the fan, and observe smoke drawn right into the filter.
- **Adjust position.** Place the extractor 6–10 cm from your soldering area for best results.
- **Check airflow.** If you want more suction, consider swapping for a higher CFM fan or adding a PWM controller.
---
## Safety and Maintenance
Fume extractors aren’t “set it and forget it” devices. Regular upkeep ensures effectiveness:
- **Replace filters:** Swap foam and carbon sheets every 3–6 months, or sooner if visibly clogged.
- **Clean fan blades:** Dust and debris reduce airflow; wipe blades gently with a damp cloth.
- **Inspect housing:** Check for cracks, leaks, or loose mounting points.
- **Test airflow:** Once a month, confirm smoke is drawn effectively.
Keep the extractor close to your work. If fumes escape the sides, reposition or seal housing gaps.
---
## Optional Upgrades
Want to take your build further? Try these enhancements:
- **Adjustable speed:** Add a PWM controller or potentiometer for variable fan speeds.
- **LED indicator:** Install an LED to show when the extractor is powered.
- **HEPA filtration:** Add HEPA filter layers for even finer particulate capture.
- **Battery-powered operation:** Use a 12V lithium battery for cordless portability.
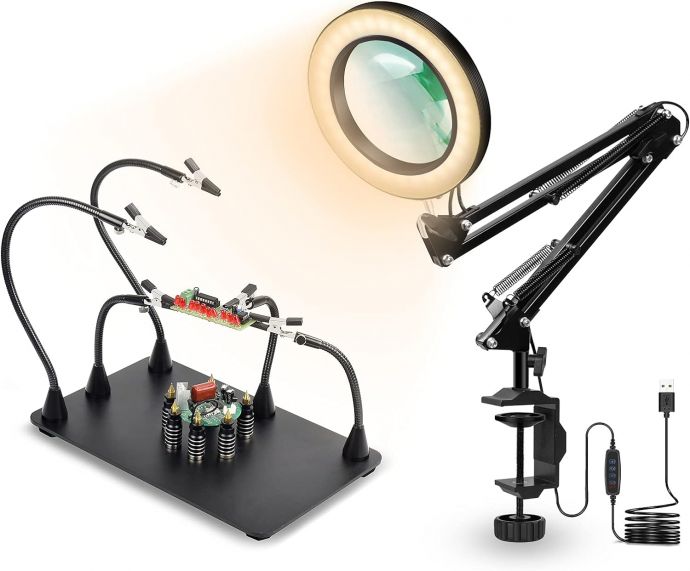
- **Flexible mounting:** Add a gooseneck arm or magnetic base for easy positioning.
---
## Real-World Tips and Tricks
- **Noise:** Some fans are quieter than others. Premium PC fans (Noctua, Arctic) offer lower vibrations.
- **Size:** Don’t oversize your extractor—120mm is a good balance for desktop use.
- **Multiple extractors:** If you frequently solder large boards or multiple stations, build two units and position at opposite angles.
- **Workbench integration:** Mount the extractor under a small shelf above your workspace for hands-free operation.
---
## How Effective Are DIY Fume Extractors?
Well-built DIY units can rival commercial extractors. Activated carbon removes odors and some VOCs; filter foam catches particulates. HEPA filter upgrades offer nearly 100% removal of fine particles. For best results, run the extractor continuously while soldering.
**Studies suggest** that localized filtration at the soldering point captures up to 90% of harmful fumes, especially with appropriate filter media and fan speed.
---
## Conclusion: Protect Your Lungs, Enjoy Your Projects
Building a 12V DIY Smoke Slayer is more than a fun electronics experiment—it’s an investment in your health. Solder fume extractors help reduce exposure