Soldering is at the heart of countless electronics, robotics, and DIY projects. Whether you’re assembling a custom keyboard, fixing a broken wire, or prototyping the next big gadget, you’ll inevitably encounter the familiar—and hazardous—scent of solder smoke. While it may seem innocuous in small amounts, soldering fumes can quietly introduce a range of health hazards into your workspace. Understanding the risks, and how to mitigate them, is essential for everyone who picks up a soldering iron.
**Why You Need a Smoke Absorber in Your Soldering Space**
Solder smoke is not just an annoyance. The fumes produced during soldering, especially from fluxes or leaded solder, contain microscopic particles and volatile organic compounds that can irritate the eyes, nose, and respiratory system. Prolonged exposure can lead to chronic health problems, even if you don’t notice them right away.
Some of the harmful substances found in solder smoke include:
- **Rosin (colophony) particles**: These, found in traditional flux, can cause occupational asthma and allergic reactions.

- **Lead vapors**: If you use leaded solder, minuscule amounts of lead fumes are released, posing a risk of heavy metal poisoning.
- **Formaldehyde and other aldehydes**: Byproducts from certain fluxes, which are carcinogenic and may cause memory and respiratory issues.
- **Tin dust and other metals**: Even lead-free solder isn’t risk-free.
Even with good room ventilation, fumes tend to rise directly into your breathing zone while you work. That’s why a dedicated smoke absorber is not a luxury—it's an essential tool for healthy and comfortable soldering.
**Commercial Smoke Absorbers vs. DIY: Why Build Your Own?**
You might ask, “Why not just buy a smoke absorber?” Certainly, there are plenty of commercial options for hobbyists and professionals alike. However, many of these are underpowered, noisy, or quite expensive for what they offer. Building your own gives you several advantages:
- **Cost-Effectiveness**: DIY solutions are often much cheaper.
- **Customization**: You control airflow rate, filter type, and physical dimensions.
- **Upgradability**: Need more power or better filtration? Just swap out parts.
- **Satisfaction**: There’s pride in protecting your health with something you built yourself.
Let’s walk through constructing a 12V-powered DIY smoke absorber that’s quiet, efficient, and adaptable for nearly any bench setup.
---
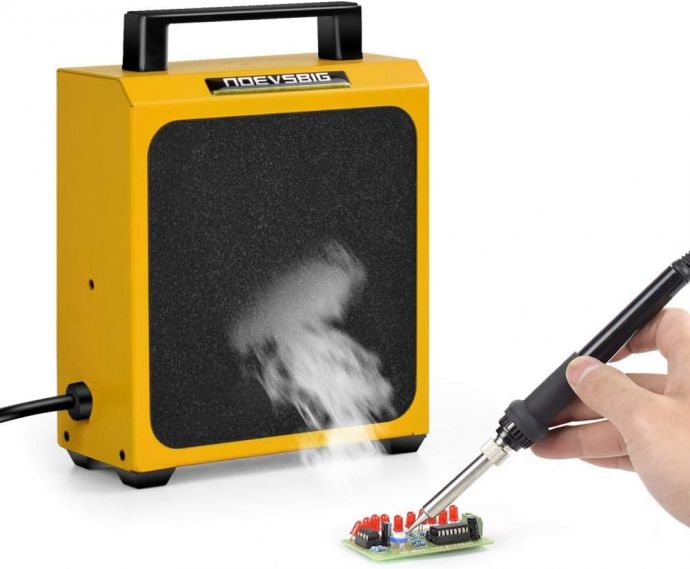
## The Anatomy of a DIY Solder Smoke Absorber
A basic but effective smoke absorber consists of these components:
1. **Fan**: Draws air (and smoke) away from your work area.
2. **Filter**: Captures particulates and absorbs hazardous chemicals.
3. **Enclosure/Mount**: Positions the fan and filter close to the source of fumes.
4. **Power Supply**: Provides energy, in this case, 12 volts—a common, safe, and flexible voltage for DC projects.
Let’s break down each part and help you pick the right components for your needs.
### 1. Fan Selection
The fan is the heart of your absorber. You want enough airflow to catch as much smoke as possible, but not so much that your components or soldering process are disrupted.
- **Type**: Most builders use a 120mm (or larger) 12V DC computer cooling fan. These are inexpensive, easy to source, reasonably quiet, and efficient for this application.
- **Airflow**: Target a fan with a CFM (cubic feet per minute) between 50 and 100. More airflow means more smoke captured, but higher speeds can get noisy.
- **Static Pressure**: The fan must pull air through a filter, so look for a model with decent static pressure.
**Tip:** If quiet operation is especially important, opt for a “silent” or “low noise” fan. If you want a compact absorber, a smaller 80mm fan can work (with less suction).
### 2. Filtration: Capturing What Matters
A fan alone won’t protect you; the filter is where fumes are trapped.
- **Filter Material**: The gold standard is an **activated carbon filter**. It absorbs organic vapors and captures particulates. Many use replacement carbon filter pads made for soldering fume extractors, which can be cut to size.
- **Pre-Filter**: For extra effectiveness and longer filter life, sandwich a layer of HEPA or fine foam before the carbon—this grabs the bulkier particles.
- **Replacement**: Make your filter easily accessible so you can swap it out regularly (about monthly with heavy use, quarterly for light duty).
### 3. Enclosure and Mount: Getting Smoke Where It Matters
The best fan and filter are useless if smoke can just bypass them. Your absorber should sit as close to your solder joint as practical—generally within 10–20 cm.
- **Enclosure**: A simple frame made from acrylic, plywood, or even 3D-printed plastic is enough. The fan is mounted securely behind the filter, ideally with the front flush or slightly recessed.
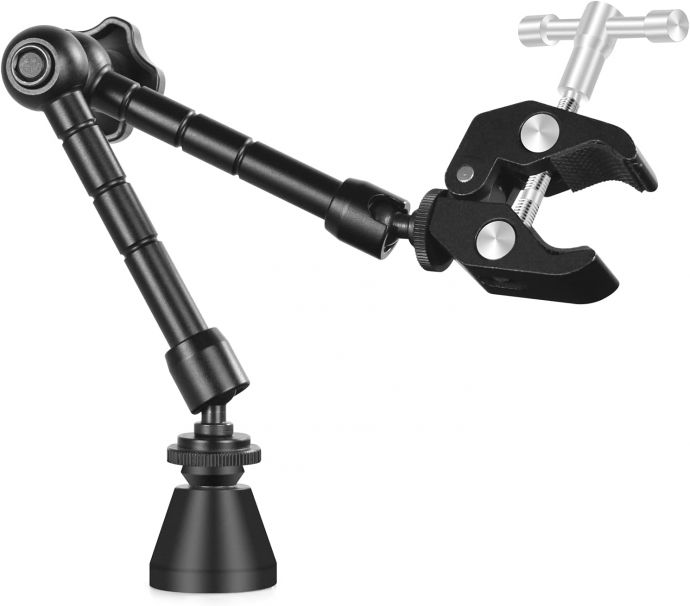
- **Mounting**: Consider a stand, articulated arm, or clamp to keep the unit stable and adjustable. You can design it to hang off your bench, sit upright, or even be wall-mounted for tight spaces.
### 4. 12V Power: Safe and Simple
12-volt DC power is common and safe to work with, and fans often are spec’d for it.
- **Power Adapters**: Any surplus or old laptop power brick (with the right voltage and current) will do. Make sure your supply can handle the fan’s amperage.
- **Switches**: Add a rocker or toggle switch for convenient operation.
- **Connectors**: Standard barrel jacks or screw terminals make it easy to swap or replace power leads.
---
## Step-by-Step Guide: Building Your Own 12V Solder Smoke Absorber
Let’s walk through a straightforward design you can adapt to your bench. You need only basic hand tools and simple electronic skills.
### **Materials List**
- **1x 120mm 12V DC fan**
- **1x Activated carbon filter pad (sized to fit)**
- **Optional: HEPA pre-filter material or foam**
- **Plywood, acrylic, or other sheet material (for housing)**
- **M3 or #6 bolts/nuts (for mounting the fan)**
- **12V DC power supply (1A or higher)**
- **Rocker switch (optional)**
- **Wire, solder, shrink tube, and basic tools**
**Total Project Cost**: $15–$35, depending on parts you have on hand.
### **Building the Frame**
**Design Overview:**
A basic square housing, roughly 140mm x 140mm, about 50mm deep. Fan mounts at the back, with the filter at the front.
1. **Cut Housing Panels**: Cut four panels (top, bottom, sides) plus a backing and a front frame (to hold the filter) from your material.
- Make a square hole in the back panel for the fan, matching its diameter.
- Optionally, vent holes on the sides can assist airflow.
2. **Fan Mounting**: Position the fan at the rear. Mark and drill holes to line up with your fan’s mounting tabs. Attach using bolts/nuts.
3. **Filter Holder**: Make a filter “grill” or holder for the front panel. You can use a ring of thin material, clipped or screwed in place, to sandwich the filter securely.
4. **Assembly**: Glue or screw the panels into a box shape. Ensure good structural integrity.
5. **Optional Stand**: For stability, attach a wide base, a folding-leg assembly, or a simple clamp-on bracket so your absorber can sit upright or be positioned at an angle.
### **Wiring Things Up**
1. **Power Wiring**: Solder wires from the fan’s leads to your power connector (barrel jack or screw terminal).
2. **Switch**: To add an on/off switch, splice it into the positive wire between the fan and the power jack.
3. **Test**: Plug into your 12V supply—ensure the fan spins up smoothly.
### **Filter Placement**
Layer your carbon filter pad at the very front, optionally topped with a HEPA or foam layer. Secure with the filter grill or frame you’ve built. Make filter changes as simple as possible.
---
## Enhancements and Safety Features
**Improvements to Consider:**
- **Speed controller**: Add a simple PWM controller or potentiometer for variable fan speed.
- **Noise dampening**: Line the enclosure with sound-absorbing foam for near-silent operation.
- **Multiple filters**: Stack carbon and HEPA layers for maximum filtration.
- **Indicator light**: Add an LED to show when the absorber is on.
- **Fan guard**: Always protect the fan blades from fingers or debris with a grill.
**Safety Reminders:**
- Ensure your power supply is matched to your fan voltage/current needs.
- Never operate a smoke absorber unattended with a soldering iron left on.
- Regularly change filters—they lose effectiveness as they fill up.
- Always solder with proper ventilation in addition to your absorber.
---
## How Well Do DIY Smoke Absorbers Work?
A properly built DIY smoke absorber with quality filtration can reduce fume exposure at your workspace by 70–90%. The key is positioning: always keep the absorber’s intake as close to the solder joint as possible. At just $20–$30, you’ll see performance rivaling much pricier commercial models.
However, keep in mind:
- No absorber, DIY or commercial, replaces *good room ventilation*. Always work in a space with fresh air.
- Pros