Soldering, a process essential to electronics enthusiasts and professionals alike, often produces harmful fumes that can be detrimental to health over prolonged exposure. Consequently, the need for an effective smoke absorber becomes paramount. Imagine working in a fume-free workspace where you can focus on your intricate soldering tasks without worrying about inhaling toxic fumes. The solution? A DIY smoke absorber fan, running on a modest 12 volts but offering extraordinary efficacy in creating a safer, cleaner work environment.
### Understanding the Need for a Smoke Absorber

Soldering involves melting solder to join metal pieces together, typically on a circuit board. This process releases a variety of harmful substances, including lead, rosin, and other chemical fumes. Prolonged inhalation of these fumes can cause respiratory issues, headaches, and other long-term health concerns. Therefore, a smoke absorber is indispensable for anyone serious about safe soldering practices.
### Why DIY?
While there are numerous commercially available smoke absorbers, building your own offers several advantages. Not only does this approach allow for customization to suit your specific needs and workspace dimensions, but it's also a rewarding project that can save money and provide a deeper understanding of electrical and mechanical components. Let's explore how to create your very own 12V DIY smoke absorber fan.
### Components Required
Before starting the construction, gather all necessary components. Here’s a detailed list:
1. **12V DC Fan**: The core component. Select a fan with sufficient airflow, typically measured in cubic feet per minute (CFM). A fan rated around 120 CFM is ideal for most soldering tasks.

2. **Power Supply**: A 12V DC adapter or battery pack to power your fan.
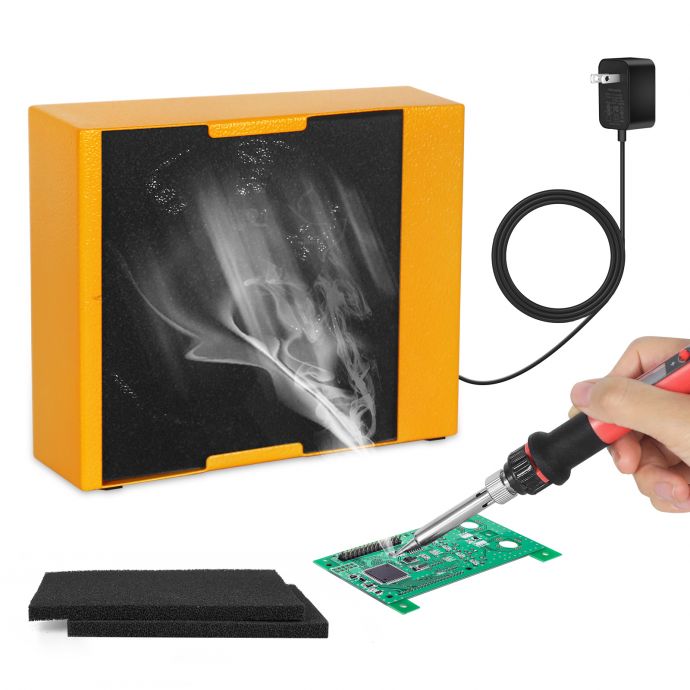
3. **Activated Carbon Filter**: Essential for trapping harmful particles from the soldering fumes.
4. **Housing for the Fan**: This can be a plastic or metal enclosure that fits the fan and filter snugly.
5. **On/Off Switch**: To control the power to the fan.
6. **Basic Tools and Supplies**: Soldering iron, solder, screwdrivers, wire cutters, electrical tape, glue, and screws.

### Step-by-Step Construction Guide
#### Step 1: Preparing the Housing
Begin by selecting an appropriate housing. An old computer power supply case, project box, or even a small plastic container can serve well. The housing should be large enough to accommodate both the fan and the activated carbon filter.
1. **Cut an Opening for the Fan**: Using a drill and cutting tools, create an opening on one side of the housing slightly smaller than the fan's frame.
2. **Ventilation Holes**: Drill several smaller holes on the opposite side of the housing to allow airflow through the filter.
#### Step 2: Mounting the Fan
Secure the 12V fan to the housing opening you have created. Use screws or brackets to ensure the fan is firmly in place.
1. **Positioning the Fan**: The airflow should be directed outward, pulling fumes into the enclosure and through the activated carbon filter.
2. **Wiring**: Connect the fan's power wires to the appropriate terminals. Use solder and electrical tape to ensure secure and insulated connections.
#### Step 3: Installing the Filter
The activated carbon filter is crucial for trapping the fumes and preventing them from escaping back into the workspace.
1. **Cut the Filter to Size**: Trim the filter to fit snugly within the housing, covering the ventilation holes you drilled.
2. **Securing the Filter**: Use clips, a frame, or a small amount of adhesive to hold the filter in place. Ensure it is easily replaceable for future maintenance.
#### Step 4: Adding the Power Supply
Connect the power supply to the fan. This could be a 12V adapter that plugs into a wall socket or a battery pack for a more portable solution.
1. **Adding the Switch**: Wire an on/off switch in series with the power supply wire to easily control the fan. Mount the switch on the exterior of the housing for easy access.
2. **Testing the Connection**: Before fully assembling the housing, test the connection to ensure that the fan operates correctly when powered on.
#### Step 5: Final Assembly
Ensure all components are securely mounted and that the wires are properly insulated.
1. **Closing the Housing**: Attach the side panels of the housing, ensuring no loose wires are sticking out.
2. **Final Test Run**: Power up the fan to ensure everything is working as expected. The fan should draw air through the activated carbon filter, providing a noticeable reduction in fumes.
### Benefits of Your DIY Smoke Absorber Fan
Upon completion, you'll have a powerful tool to keep your workspace safe and fume-free. The benefits are multifaceted:
1. **Health Protection**: Significantly reduces inhalation of harmful fumes, protecting your respiratory system.
2. **Cost Efficiency**: Building your own smoke absorber is typically cheaper than purchasing a commercial unit of equivalent performance.
3. **Customization**: You can tailor the design to fit your specific needs, adding features such as speed control or additional filtration stages.
4. **Educational Experience**: Enhances your understanding of basic electronics, soldering, and air filtration principles.
### Maintenance and Upgrades
To ensure your smoke absorber fan continues performing optimally, regular maintenance is necessary. Periodically check and replace the activated carbon filter as needed, depending on usage frequency.
1. **Filter Replacement**: A general guideline is to replace the filter every 40-60 hours of use or when you notice a decline in its efficiency.
2. **Fan Maintenance**: Clean dust and debris from the fan blades and housing to maintain airflow.
For those inclined towards continuous improvement, consider future upgrades:
1. **Speed Control**: Add a potentiometer to control the fan speed, allowing you to adjust the airflow according to the task's intensity.
2. **Additional Filters**: Integrate HEPA filters for even finer particle filtration.
3. **Noise Reduction**: Add rubber mounts or insulation to reduce operational noise.
### Conclusion
Building your own 12V DIY smoke absorber fan is an empowering project that combines practical necessity with technical skill. Not only does it significantly improve your soldering workspace by ensuring a healthier environment, but it also fosters a deeper appreciation for the intricacies of DIY electronics projects. With the right components and a bit of effort, you can unleash your soldering prowess in a cleaner, safer, and more efficient workspace, all while relishing the satisfaction of creating something truly useful from scratch. Happy soldering!