For electronics enthusiasts and professional makers alike, soldering is an indispensable skill. The process, however, isn’t without its hazards. One of the most overlooked risks in small workshops and hobbyist desks is exposure to soldering fumes. These fumes – a nasty cocktail of rosin-based flux, particulate matter, and potentially toxic elements like lead – pose a significant threat to your lungs, especially with long-term exposure or in poorly ventilated environments.
Commercial fume extractors can be expensive, putting a healthy work environment out of reach for those on a budget. The good news? With basic tools, some inexpensive parts, and a weekend afternoon, you can build an efficient 12V smoke absorber tailored for your workspace. Let’s walk through the why, the what, and the how so you can solder confidently, safeguard your health, and save your cash for your next electronics project.

## Why Soldering Fumes Are Bad News
Before diving into construction, it’s essential to understand what’s at stake. Typical solder fumes are generated from:
- **Flux smoke:** The most visible and irritating. While helping solder flow and bond, flux releases aldehydes and rosin vapors when heated. These can irritate your nose, eyes, and throat, and long-term exposure has been linked to asthma and other respiratory issues.
- **Metallic fumes:** When using solder containing lead or tin, heating can also create metal particulates. Breathing in these can introduce toxins into your body.
- **Additive byproducts:** Modern “lead-free” solders, while generally safer, sometimes emit more irritating fumes due to aggressive flux cores.
Many workshops rely on open windows or tabletop fans aimed *away* from the workspace. While these measure might clear the air a little, they won’t capture or filter out the harmful particles and gases released during soldering. Enter the fume extractor—a device specifically designed to suck up and filter out nasty air right at the source.
## What Makes a Good Fume Extractor?
A fume extractor suitable for soldering typically consists of:
1. **A powerful fan** to draw air—and smoke—away from the work.
2. **A filter** to trap particulates (like rosin smoke and solder fumes) and adsorb gases (like volatile organic compounds).
3. **A form factor** that allows easy placement and operation near your workspace.

While professional versions use advanced multi-stage HEPA and carbon filtration (at a price!), a properly designed DIY unit with a good-quality carbon filter and a decently-sized fan will dramatically improve your indoor air during soldering.
## What You’ll Need for This DIY Project
This build uses a 12V DC fan, making it easy to power with a small wall adapter, a battery source, or even off-grid power setups. Here’s the basic parts list:
### Core Components
- **120mm (or larger) 12V DC fan**: These are the standard size for computer case fans. A fan rated at 0.2A or higher will provide optimal airflow.
- **Activated carbon filter**: Pre-cut replacement filters for commercial solder smoke absorbers are widely available, or you can buy a sheet and cut to size.
- **Fan guard or grill**: To protect fingers and prevent filter sagging.
- **Power supply**: A 12V wall wart (1A or higher) is most reliable. Alternatively, a DC jack for use with battery packs.
- **On/off switch**: Inline switch or panel-mount type.
### Optional (But Helpful)
- **Fan speed controller or potentiometer**: Lets you adjust extraction strength according to your needs.

- **LED indicator**: For power status.
- **Handle or stand**: For ease of placement.
### Enclosure and Mounting
- **Plastic enclosure**: Old project boxes, food storage containers, even repurposed computer power supply cases work well.
- **Mounting hardware**: M4 or #6 bolts for the fan, rubber grommets, glue, Velcro strips, etc.
### Tools
- Soldering iron (ironically!).
- Hot glue gun or small screws.
- Drill for making holes in your case.
- Wire cutters/strippers and basic hand tools.
## Step-By-Step Build Guide
### 1. Plan Your Layout
Decide how you want your smoke absorber to look and operate. Should it stand upright, tilt back for optimal coverage, or be clamped to your workbench? The fan should be positioned so the center of the airflow is directly above the work area, and the carbon filter should snugly cover the airflow intake.
### 2. Prepare the Enclosure
Cut a square hole slightly smaller than your fan’s outer diameter in your enclosure. Most 120mm fans require a hole about 100–110mm wide. Drill mounting holes for the fan bolts. If including a switch or LED, mark and drill holes for those as well.
### 3. Wire Up the Electronics
The wiring is straightforward:
- Connect the fan’s positive wire to one terminal of your on/off switch.
- The other switch terminal goes to the positive terminal of your 12V power inlet.
- The fan’s negative wire connects to the negative terminal of the power source.
- If using a speed controller or potentiometer, wire it according to its datasheet (usually between power and fan positive).
Solder or crimp connections as preferred. Use heat shrink or electrical tape for insulation.
### 4. Fit the Fan and Filter
Mount the fan to the enclosure so it blows OUTWARD, *pulling* air through the filter (positioned over the intake side). This setup ensures the filter intercepts fumes before reaching the fan. Place the activated carbon filter against the fan’s intake, secured behind the grill. Foam strips or double-sided tape prevent air leaks around the filter’s edge.
For extra filtration, combine a layer of fine dust filter or HEPA sheet in front of the carbon, catching finer particulates.
### 5. Final Assembly and Test
Secure all components. The power switch and indicator LED should be easily accessible. Plug in and switch on—the fan should spin, gently but noticeably drawing air through the filter. Test for airflow using a ribbon or strip of paper; confirm the strongest airflow is where you’ll be soldering.
### 6. Use and Maintenance
Place your soldering workpiece directly in the extractor’s flow field (within 15–20cm of the filter is best). As smoke rises, it should be sucked right into the filter.
Check the filter regularly. When visibly darkened, clogged, or when you notice reduced effectiveness, replace with a fresh activated carbon sheet.
## Upgrades and Customizations
Once your basic fume extractor is up and running, consider these enhancements:
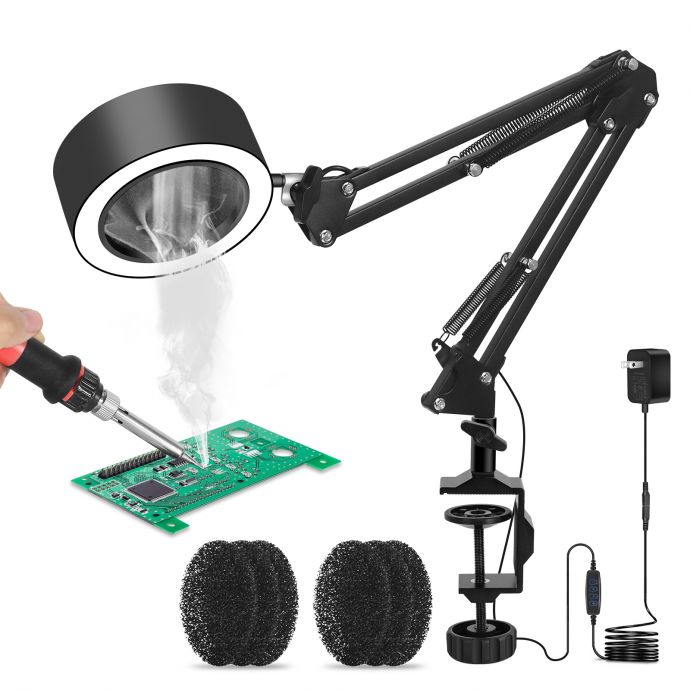
- **Articulated arm mount:** Attach your absorber to a pivoting arm for precise positioning above large workpieces.
- **Replaceable filter cassettes:** Build a filter “drawer” or magnetic holder for quick swaps.
- **Noise suppression:** Line the enclosure with felt or foam for quieter operation.
- **Multiple fans or larger fans:** For those who solder for hours or in larger spaces, a twin-fan array or big blower will clear more fumes, faster.
## Safety and Best Practices
While your DIY fume extractor is a huge step up from nothing, remember:
- **Don’t put off filter changes**—once the carbon is saturated, it won’t protect you.
- **Don’t solder in unventilated tiny spaces**—open a window for fresh air exchange.
- **If using leaded solder**, always wash your hands after working; your extractor won’t filter out lead particles deposited on surfaces.
A quality smoke absorber reduces your exposure to airborne toxins, thus helping you avoid headaches, sore throats, and cumulative damage to your lungs—all with a modest investment.
## Solder Clear with Confidence
By constructing your own 12V smoke absorber, you’re making an informed choice to prioritize your health and comfort while working on your favorite hobby. The process is accessible and affordable, and the resulting peace of mind is priceless.
Not only will your air be cleaner, but you’ll also learn valuable skills in electronics, fabrication, and air quality management. Share your build with others, encourage your fellow makers to take fume exposure seriously, and enjoy your soldering time knowing your workspace—and your lungs—are safer. Happy building!