Soldering printed circuit boards (PCBs) can sometimes feel like an art form, requiring precision, patience, and the right set of tools. For hobbyists and professional electronics enthusiasts alike, mastering the craft of soldering is a skill that can unlock endless possibilities in creating custom electronic projects. One tool in particular that has revolutionized the way we approach PCB work is the magnetic helping hands tool, especially those integrated with 3X LED magnification. This guide will explore the profound impact this tool can have on your soldering journey and provide essential tips to unleash your innate soldering superpowers.
**Understanding the PCB Soldering Process**

Before delving into the benefits of using a magnetic helping hands tool, it’s crucial to understand the basics of soldering PCBs. The process involves joining electronic components to a circuit board with solder, a fusible metal alloy designed to melt at a low temperature. This technique forms a reliable electrical connection between components.
Precision is key; poor soldering can lead to weak connections or even damage to components. That’s where the right tools make all the difference. Traditional soldering setups often involve basic stands or clamping systems, which may lack stability and flexibility, making intricate work challenging.
**The Game-Changing Magnetic Helping Hands Tool**

Enter the magnetic helping hands tool—a modern solution designed to provide unparalleled control and convenience when working on PCBs. Unlike traditional stands that can be cumbersome, this tool offers several advantages that significantly enhance the soldering process.
**1. Stability and Versatility**
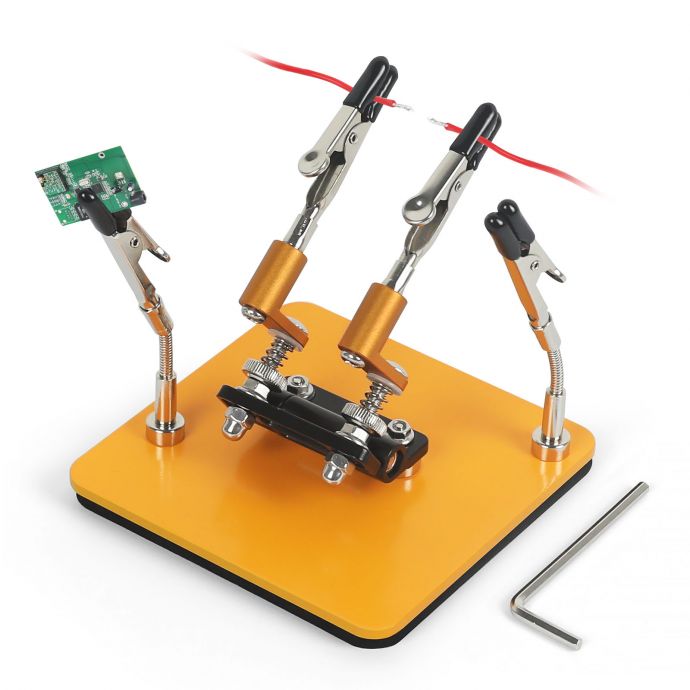
Magnetic helping hands come equipped with flexible, articulated arms, typically fitted with alligator clips at their ends. These arms are mounted on a metal base, which clings securely to any ferrous surface. This design allows you to position your workpiece at the perfect angle, improving accessibility and stability while minimizing the risk of accidental movement during soldering.

Additionally, the magnetic base means that the tool can be effortlessly repositioned around your workspace, providing adaptability without sacrificing grip. This feature is invaluable when working on large or complex boards.
**2. Enhanced Visibility with 3X LED Magnification**
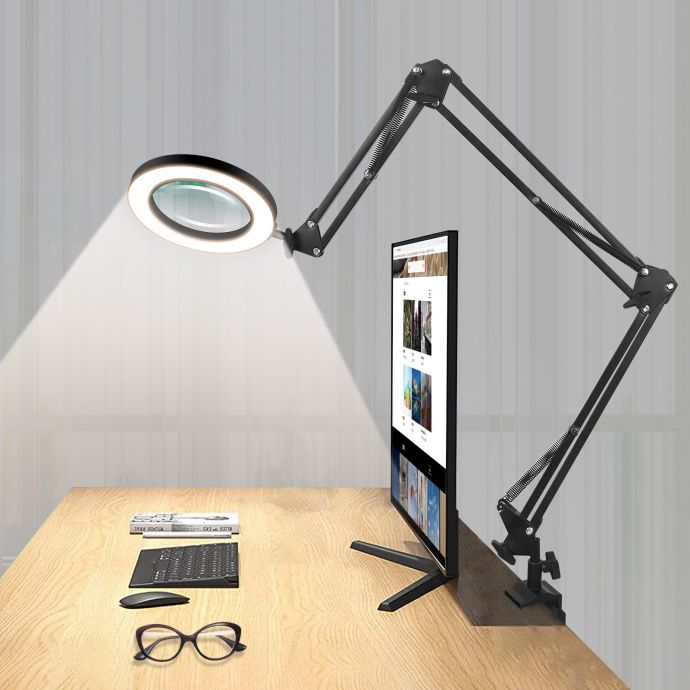
One of the standout features of advanced helping hands tools is integrated LED magnification. The 3X magnification provides a close-up view of your work, revealing details invisible to the naked eye. This is particularly beneficial when working with small components such as surface-mounted devices (SMDs), where precision is non-negotiable.

The accompanying LED light ensures that the work area is well-lit, eliminating shadows and enhancing visibility. Adjustable brightness settings allow you to tailor the lighting to suit your environment, reducing eye strain and enhancing focus on fine details.
**3. Improved Ergonomics and Comfort**
Holding tiny components steady by hand for extended periods can lead to discomfort and fatigue. The magnetic helping hands tool acts as an extra pair of reliable hands, freeing yours to focus on precision soldering. This ergonomic advantage reduces muscle strain and allows for longer soldering sessions without fatigue, leading to more consistent, high-quality results.

**Practical Tips for Using Your Magnetic Helping Hands Tool**
To fully leverage the capabilities of your helping hands tool, a few practical tips can optimize your experience:
**A. Choose the Right Tip for Your Soldering Iron**

Based on your project, ensure that the soldering iron tip is appropriate for the components being soldered. Finer tips provide better control for small joints, while larger tips deliver more heat for thicker connections.
**B. Position Your Board Strategically**
When setting up your board on the magnetic arms, consider the angles at which you need to work. Position it in a way that permits easy access to all solder points. The flexible arms can be adjusted to achieve just the right angle, ensuring precision.

**C. Ensure Clean Soldering Surfaces**
Oxidation and contamination can prevent solder from adhering properly. Clean both the soldering iron tip and the component leads before beginning your work to ensure strong, reliable connections.
**D. Work Methodically and Plan Your Steps**
Plot out your soldering path in advance to minimize excessive movement and re-orientation. Starting from one side of the board and working your way across systematically can save time and reduce potential errors.
**E. Make Use of the Magnification Feature Wisely**
The 3X LED magnification feature is a powerful tool for achieving precision. However, it's crucial to take periodic breaks to prevent eye fatigue. Adjust the magnification and lighting according to the task at hand for optimal results.
**Exploring New Horizons with Enhanced Soldering Skills**
The magnetic helping hands tool isn’t just a gadget; it’s a catalyst for expanding your capabilities and confidence in PCB soldering. By allowing for more stable, precise, and comfortable work, this tool opens up new possibilities in electronic design and repair.
With practice, patience, and quality tools like the magnetic helping hands with LED magnification, you can tackle more ambitious and intricate projects—from designing your own electronic devices to repairing sophisticated gadgets. As you refine your soldering skills, you become empowered to transform electronic ideas into tangible reality, equipped with the superpowers to master any PCB challenge that comes your way.
In conclusion, investing in the right tools and honing your technique can significantly enhance your soldering experience. The magnetic helping hands tool with 3X LED magnification isn't just an accessory; it's a transformative ally in your journey to mastering the intricate world of PCBs. With it, you can unleash your true potential and explore the ever-evolving landscape of electronics with confidence and precision.


