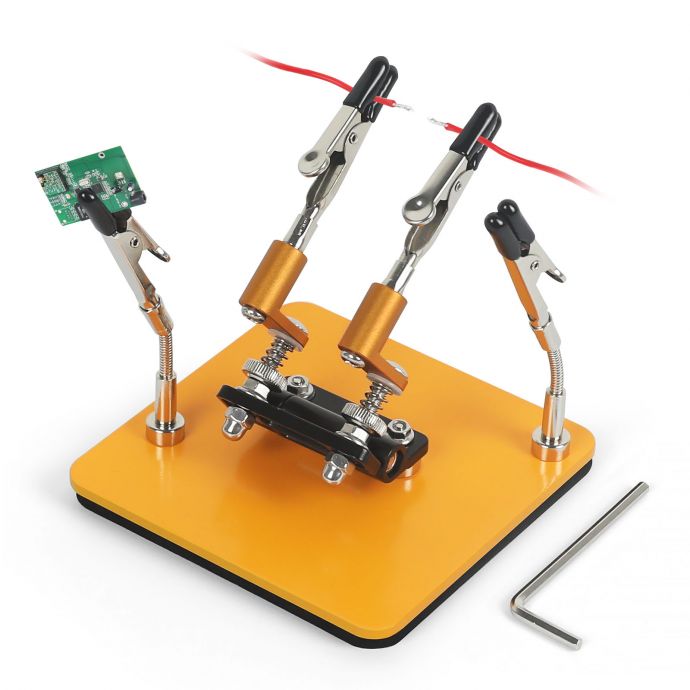
In the world of electronics and jewelry making, precision is key. Every connection, joint, and intricate detail requires meticulous attention and a steady hand. For these tasks, a magnetic helping hands tool equipped with 3X magnification is an invaluable accessory. This guide will explore how to maximize this tool’s potential, ensuring your projects are executed with precision and excellence.
### Understanding the Basics

Magnetic helping hands tools are designed to stabilize your work, freeing up your hands and allowing you to focus solely on the task at hand. Typically, these tools feature adjustable metal arms with alligator clips to hold components securely in place. The addition of a 3X magnification lens enhances visibility, allowing you to see fine details clearly and work with greater accuracy.
### The Importance of Magnification in Soldering
Precision soldering requires not just skill but also the ability to see the tiniest details. A magnifying glass with 3X magnification is ideal for this purpose, providing a clear, enlarged view of the work surface. This allows you to spot potential issues like cold solder joints or short circuits with ease, ensuring a clean and functional end result.

### Setting Up Your Magnetic Helping Hands Tool
The first step to mastering your magnetic helping hands tool is proper setup. Position the base securely on your workbench. The magnetic base should hold firm, preventing any unwanted movement during operation. Adjust the arms so that they can comfortably reach the component you plan to work on. Ensure the magnifying glass is positioned to provide a clear view without straining your posture.
### Preparing Your Workspace

A well-organized, clean workspace is crucial for precision soldering. Make sure your tools are within easy reach and that your work area is well-lit. Adequate lighting, combined with the magnifying glass, will help you identify and correct minute imperfections in your work. Additionally, keep soldering iron tips, various solder sizes, and flux close by, as these are essential for different stages and types of soldering.
### Techniques for Precision Soldering
With your setup ready, it’s time to enhance your soldering technique:

1. **Component Stabilization:** Use the alligator clips to hold your components securely. Ensure there is no movement; even a slight shift can lead to a poor solder joint.
2. **Flux Application:** Flux is essential for cleaning and preparing metal surfaces for soldering. Apply it carefully to the areas you’ll be soldering, enhancing the flow and bonding of solder.
3. **Soldering Iron Control:** A temperature-controlled soldering iron offers better results. Heat the joint, not the solder, to achieve a strong bond. Avoid overheating to prevent damage to components or circuit boards.

4. **Solder Application:** Feed the solder into the joint, allowing it to flow smoothly over the metal. Use the magnifying glass to inspect the joint upon completion, ensuring it is smooth and shiny, indicating a good connection.
### Troubleshooting Common Issues
Even with practice, issues can arise during soldering:

- **Cold Solder Joints:** These appear rough and are not shiny. They occur when the solder doesn’t melt completely. To fix this, reheat the joint until the solder flows smoothly.
- **Bridging:** This is when solder connects two or more joints accidentally. Use desoldering braid or a solder sucker to remove excess solder.
- **Component Damage:** Overheating can damage components. If you notice discoloration or warping, reassess your technique and ensure components aren’t exposed to excessive heat.

### Maintaining Your Tools
Regular maintenance of your helping hands tool and soldering equipment is crucial for longevity and performance.
- **Cleaning:** After each use, clean your soldering iron tip with a damp sponge to remove residual solder. This prevents oxidation and prolongs the life of the tip.
- **Adjustments:** Periodically check the tension and adjustments of the alligator clips and arms. Tighten any loose parts to maintain stability.
- **Magnifying Glass Care:** Keep the lens clean and scratch-free for optimal clarity. Use a soft, lint-free cloth to wipe the glass, ensuring it’s free of fingerprints and dust.
### Safety Considerations
Always prioritize safety while soldering:
- **Ventilation:** Work in a well-ventilated area to avoid inhaling fumes produced during soldering.
- **Protective Gear:** Wear safety goggles to protect your eyes from solder splashes and flying debris.
- **Fire Hazards:** Keep flammable materials away from your work area, and always place your soldering iron in a secure stand when not in use.
### Expanding Your Skills
As you grow more comfortable with your magnetic helping hands tool, consider exploring more complex projects. Tackle multi-layer circuit boards or experiment with different solder alloys to expand your expertise. Joining communities or forums dedicated to electronics and soldering can provide support and inspiration, helping you refine your skills further.
In conclusion, a magnetic helping hands tool with 3X magnification is a game-changer for anyone involved in precision work. By mastering its setup and application, you can achieve impeccable soldering results, enhancing the quality and reliability of your projects. With practice, attention to detail, and a commitment to safety and maintenance, you can unlock the full potential of this indispensable tool.


